
Mawk's Heroes and Villains Guides: Han Solo
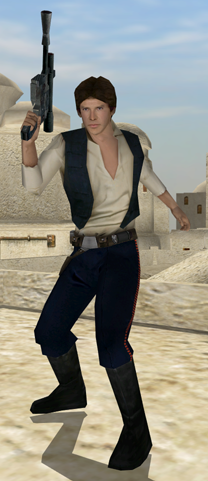
Han Solo: Force Guide
Overview: Han is a strong character when it comes to health. He can take more hits than the average character. He is a gunner. His main weapon is a repeating hand blaster. His secondary weapons are remote mines and damage reduction group buff. He also has a fusion cutter for repair of medical and ammo droids. He is very tough to play when it is crowded but can be powerful when used properly.
Han's movement is normal speed. His sprint is NOT a Jedi sprint. It is just a faster run speed. While sprinting his jump can launch him further than a normal jump. You can use this to your advantage in many cases. You can use the sprint jump to get onto hard to reach roofs for sniping. You can use it to get away from enemies. Roll will also be your ally.
When enemies are dashing at you, the first thing you want to try is rolling sideways from them and then sprint away to get to safety. If you find this is not working for you, Han has a unique way of not getting stopped while doing the sprint jump in midair. The dangerous part about this, is in order to succeed, you must sprint and jump over them. They may jump too if they see you jumping, so it's very possible to crash to the ground and be killed. Sometimes you can sprint away from them and jump. When doing this, turn around in the air and face them to get a few shots off.
When they are dashing you they also are VERY exposed to your shots. Han's repeating hand blaster fires three bolts. The closer you are to the enemy, the more accurate these bolts are. The bolts spread out the further you are shooting and are not very accurate. They still do damage though. Back to the point: When characters are dashing at you their head is exposed. If you are able to hit all 3 bolts at their head, they will die (minus Grievous and Vader). So if you are brave, stand your ground and try to fire off a few headshots. This is only possible if you have a bit of distance and some time.
You're probably asking, "Ok but I always get forced as Han Solo, what can I do about that?" Answer: Nothing. Sorry. If you are going to be pushed by Maul, you'll most likely die. Han doesn't have block. So you will need to evade as much as possible. Stay on my favorite domed roofs, and you have a bit of room to work. If you use the domed roof, you can hide from being forced and may be able to fire off some blasts. If you are around other heroes, use your group buff so you have extra health to work with. Try to do this very often. You only have one charge of it so you'll need to memorize the location of ammo droids.
You do have a bit of advantage when you are choked. Many inexperienced chokers do not get close enough for when the choke drops. Or they may try to dash you after they finish their choke. Your fingers will hurt, but mash that roll button as they are choking you so when it is released you may be able to get away. I've noticed as a choker and as Han that he can get away from choke more than a Jedi can. You will definitely want to avoid being in open areas, because if you get away and roll, you will probably be choked again.
The good thing about being choked is that your sprint power refreshes while you are being choked. As I have stated before, when a character is sprinting they cannot be stopped via choke. So if you do happen to get away from a choke, or know you are going to be choked, sprint and hide. Your health will go down but you won't be stopped unless you stop sprinting. If you get away, try to get the group buff on (which can only be activated only when you're near another team member), tuck away behind a building and get a mine up. They will chase you so be prepared. They may pass near your mine and boom.
Mines are very powerful. Within range, a full health character can die from a single mine, minus Vader and Grievous. Mines must be well placed and not wasted. Han only has 5 mines at a time if you are not near an ammo droid. You can trick the enemy to fall across your mine by exposing yourself. You can drop them from roofs onto an enemy. You can also take a full blast of your own mine (if full health) and survive as a kamikaze tactic. You can throw them when someone is jumping at you and blast them out of the sky.
With all of these tactics the first thing you need to learn is throwing mines. EDIT: It has been brought to my attention there is a much easier way of throwing mines than looking up. Looking up still does work BUT this other way works a bit better. You can also see your target. Just like you can charge up Chewie's blaster, you can "charge up" Han's mines. You will not see the charge meter, but you if hold your right click until when you see the mine physically strapped to his arm. You then have the ability to release the mine. Based on where you are looking you will release the mine to that spot. Look up if you want to throw it really far. Look just above straight ahead if you want it to be thrown a bit in front of you. This makes it much easier to detonate as it passes your targets head, since you can see it. I have tried this and I feel this is nearly flawless, but takes practice.
Once a mine is released it can be detonated at any time, even in your own face. If you are low health, don't risk the closer mid air explosions. This means if you are on a roof, do not get too close to the edge. If you are overlooking an edge with an enemy below, they will jump up and possibly do their air attack. You also run the risk of throwing a mid-air mine and exploding it in your own face. The best roofs you can use are the roofs with domes. You can run around these and drop a mine along the side of the dome. The enemy may pass and you can detonate. Be sure to use your mini map when you are running away from them, it gives you where they are and the distance. The mini map will show your roof and you'll know where you left the mine. When their arrow passes it, blow up the mine.
There are other tricks you can do to make the enemy fall into a trap. One of them is place a mine on a roof where you are located. Many jump angles make it so they land near the edge of the roof. You can blow them up when they land. Another trick is having a mine on the side of a building (ground level) and peek your head out so they see you. Take a few shots at them to make them come after you, duck behind the building and when they pass, blow them up. You can stand on the dome portion of the roof and as they hit roof level, drop a mine on their head.
The downfall to mines, is that the have a red flashing light. So either place them where they aren't easily seen, or wait for the enemy to come to you and do the look throw and explode.
As a gunner it can be VERY frustrating to always be pushed and choked. If you do not want to make the situation worse, please do not complain about this. If you choose to play Han, you run the risk of being forced. Many people just by default will go no force on a gunner. I have said in my previous articles to go force if you want the kill. Whichever way you choose to play, you will always be forced. The only reason I play Han is to make people die to a gunner and be frustrated. I'm not a big gunner fan, but it is very fun to play if you master the sniping and mine throwing. Again, please do NOT complain about being forced. One of the techniques I use is just by flat out asking them to no force you. If a maul is camping you, just say "Hey, lets see if you can go no force on me for a bit", or if you are brave say, "if you dare". Saying silly things like "wow you have to choke a gunner?" will only make you die more. Mawk's Guarantee.
Sniping is harder on Han than it is on Leia. You do not get a sniping scope. You just use normal aiming. When you use mouse3 (mouse wheel button) you zoom in a bit for more accuracy. As I said earlier, the further the target the more spread out the bolts end up. If they are further away, I suggest aiming for the body because they head may be too small to hit. After a few full sprays, they will be low health and maybe dead. When the enemy is close, one well-placed shot to the head takes them down. Now the aiming on Han is unique. The bolts don't go right in the dot of your aim, they go up and to the right slightly. If you are aiming a headshot, aim for the left side of their lower face. That will make it so you don't overshoot. If you see the top of their head over a roof, like they are hiding from you, put your center dot right on the edge of the roof. You can usually graze them or even triple headshot them.
You will always want to re-locate. When you kill somebody from a distance, the deathcam shows them where you are when they die (stupidest feature for a FPS, in my opinion). It really peeves the ego to be killed by a Han, so they will most likely come after you. It is best to not be there when they get there. Move from roof to roof unless you think you have a really good spot.
Since I included tips against dashers and chokers above, and since there is not much you can do against pushers, the only thing that remains is gunners.
Han Solo Vs. The Fetts: The Fetts have the advantage. They can fly, they have flamethrower, and Jango's shots are more accurate. What must be done is using these advantages against them. Their helmets make their heads just a bit larger, so you can target them easier. They tend to camp the tops of the spires. Take your time and aim your shot. Zoom in and go for the headshot. When a Fett first gets to a spire, they aren't going to just jump to another one because their jetpack is low. So aim carefully and you can take them unawares. When they do come after you, they will most likely flame you, so always move and back up. If you hit them dead on with each bolt, in an area that isn't the head, they will die in three different bursts. If you give yourself enough distance and they don't see you yet, shoot them and begin backing up. They will fly toward you and expose themselves. By the time they land they will be nearly dead. They will most likely get the flame off, but you will survive. If they are closer, you must rely on mines or evading. The Fett's flamethrower makes it so they cannot see in front of them well. You may have time to take a jet of the flame and throw a mine at them. You will probably die often to the Fetts, but try to keep the damage reduction power-up on.
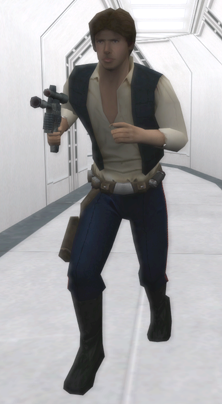
Han Solo: Non-Force Guide
Because of the fact that Non Force gunners are very similar to Force gunners, I've decided to make the gunner guides really short. Most of the tactics that are listed in the force guide will need to be utilized when playing non force, so just take a look at those for reference. These non force gunner guides will just be little reminders.
When playing as non force Han, you will want to utilize evasion techniques. The techniques such as sprint-jump, roll, and changing directions, are your best bet.
Dueling with Han is all about not screwing up. Because there is nothing to hide behind, you'll find the duel ending very soon unless you time your escapes properly. If you are on a server that allows detpacks, use those when block is up, shoot when block is down. To get the distance on detpacks, hold down your button then look up as you move forward and release. If someone is dashing you try to avoid, but don't make a habit of rolling. You can generally sprint jump to avoid saber combos, but don't do it too late.
When going full map, change your directions and levels as often as possible. If you end up getting a distance kill, change your location soon after. Use roofs and wait for someone to come to you if you can det. If you can't use dets, just try to kill people from a distance and finish them if they get close.

SWBF2 Pages
![[SL]](/images/sl-75.jpg "[SL]Fun House")


